
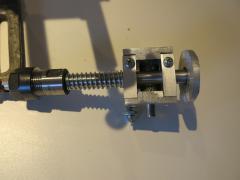
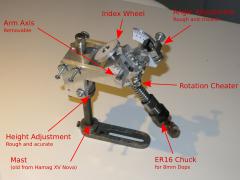
I started faceting stones only about 1 year ago and this I did with a second hand faceting head of the rather cheap kind. It was the Hamag XV Nova (see web for image), with which I started to do my first gems. I soon began to tinker around, changed the index wheel and the cheater to improve accuracy and handling:
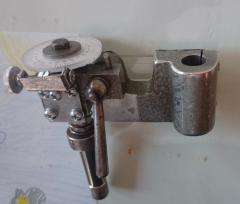
As you might see on the images this kind of faceting head allows to do everything that you need as an amateur faceter, but there are things which make the handling cumbersome and slow down the whole faceting work:
- The angle of the faceting arm is fixed. So once the angle is adjusted, the arm can not be moved up and down any more. If there's a larger amount of rough to cut away, the whole faceting head has to be lifted on the mast and then slowly lowered. Problem here is that the height adjustment is not defined, a scale to go back to a previously set height is not present.
- Also, the angle adjustment does not have a cheater and needs to be adjusted by Hand directly, where it's hard to be accurate in sub-degree level.
- To have a look at the cutting progress, you need to lift the faceting arm all the way up over the mast's end. This is not the problem doing it for one time, but doing this over and over again the faceter's shoulder start to complain...
So, essentially I had quite early the idea to build a faceting head on my own to make the handling more convenient, faster, and more accurate at the end.
- The angle adjustment should not be fixed, but the rotation should stop at a predefined angle. This should also make it possible to look at the stone without removing the arm from the mast.
- There should be a cheater for the arm's angle.
- Additionally the arm should be removeable easily.
I was looking around at faceting heads that fulfill these requirements, and there are many vendors out there offering what I was looking for. But, it didn't seem that there is a solution that is of good quality and cheap at the same time. Also, I recently had bought a milling machine (Proxxon MF-70) and extended it with CNC, so the tools were ready. But, as I'm a hobbyist without any professional experience in this matter and also limited access to raw material and further tools I had to compromise here and there. For instance the working area (X, Y) of the milling machine is quite small (134 x 46mm), so every piece that I milled had to fit into this size.
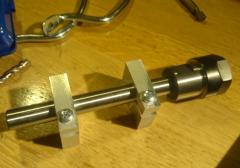
I did not change the mast as the one of the XV Nova is still in good shape and working. Base material is aluminium sheet with about 10mm thickness, for thread size I used M4 (4mm diameter). I used a ER16 collet chuck where the dop sticks can be fixed accurately.
During construction the main aspect was always to ensure accuracy of the pieces put together. The milling machine, a planar table, and a drill stand are absolutely necessary to do the job. I used Inkscape as tool to draw the pieces to be milled. Additionally I used Blender to construct the 3D model before creating the pieces to not have negative surprises when putting together the cut out pieces at the end:
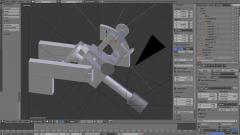
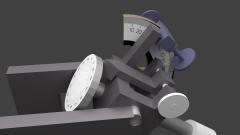

After finishing I can advise to have such a 3D model on the computer upfront. It gives you a great impression if the motion and rotation ways of the loose parts do not interfere with other parts, or for instance if the hand pointing to the angle is well visible.
The milling of the parts then was not just straight forward. As I didn't have experience with my milling machine either, I certainly had some parts that I simply had to throw away. However the start was good:
Due to my limited set of tools and raw material the faceting head at the end consists of more parts as actually would be necessary. I mostly rely on screws to keep these parts together, which certainly bears the risk that over time the whole stuff starts to hang loose and the screws need to be re-fastened. On the other hand it seems that steel screws in aluminium seem to be quite well fixed, so hopefully I will not experience too many loose screws during a faceting procedure.
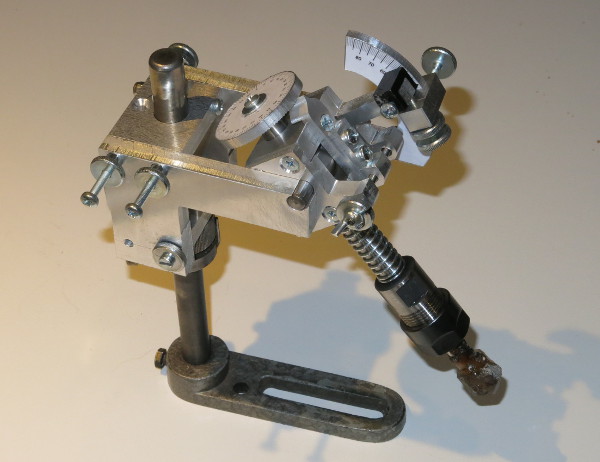
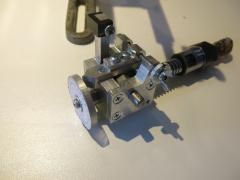
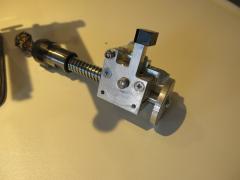
Here are some pictures of the finished faceting head:
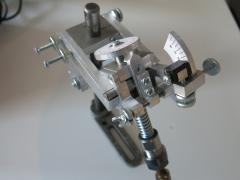
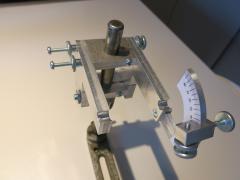
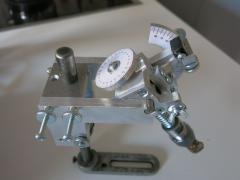
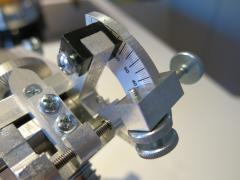
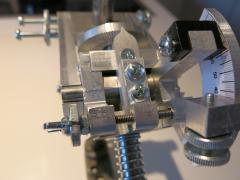
Please note the rather long screws on the top sides of the slide. I actually just didn't have enough screws with the appropriate length, so I had to help myself with this workaround.
Now the head is ready, no parts are loose, and everything seems to be accurate. However, only during faceting I will know about accuracy and handling. I will report as soon as I have results.
EDIT 2017-09-01: As it is was requested already several times you can download the files I used for planning this faceting head here.
PLEASE NOTE:
- They are completely unordered. So don't blame me, if it's hard to get along :-)
- For *.svg I used Inkscape. You need to switch the display mode to Outline (Top Menu "View"->Displaymode->Outline). Otherwise you don't see anything after opening a drawing.